Select a new theme:
Golf League Tracker Default
U.S.A.
Camo
Charcoal
Dark/Nighttime
Desert Sand
Fire and Ice
Monochrome
Ocean
Pink Pastels
SaveCancel
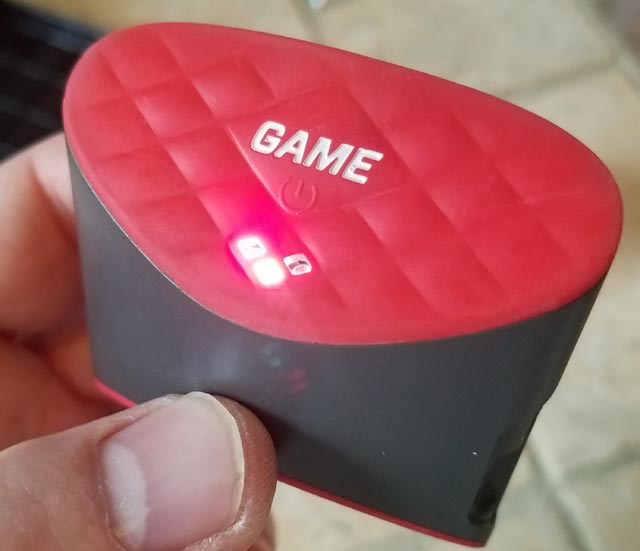
I have the original GameGolf in which the battery wasn't holding a charge any more. I have about 300 rounds in this thing, so it's time to open it up and replace the battery. It's a pretty simple fix, but you do need to be able to solder proficiently! CAUTION: Proceed at your own risk. If you don't know how to solder, or follow simple directions, you could wreck your GameGolf. Just make sure you solder the wires to the correct terminals!!
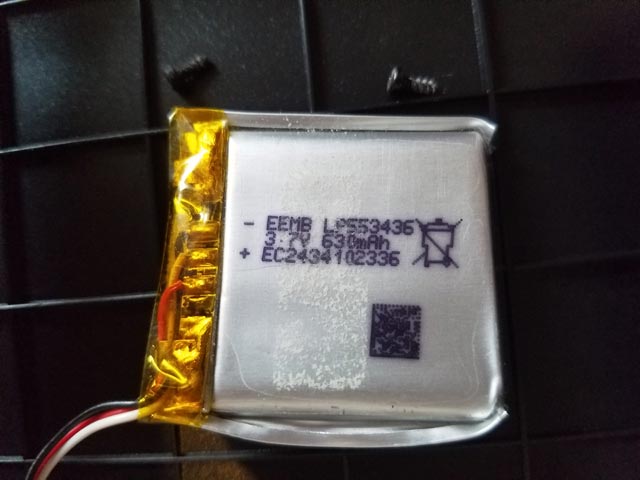
The original battery in the GameGolf is LP553040. LP stands for "Li-Polymer", or in more detail, Lithium Polymer. It's a 3.7V battery, about 650maH. The 650 refers to how much "power" it has, and is instrumental in getting a similar size so that the battery lasts the same amount of time. In doing my research, I couldn't find the exact LP553040 battery except in bulk. If you can find it, it's a simple "fix" where you open up the unit, unplug the old battery plug the new one in. The 553040 refers to the physicial size of the battery in MM. 55 is 5.5mm thick. 30 is 30mm wide, and 40 is 40mm high.
The manufacture of these batteries is EEMB, and you can see their LiPo collection here. I perused their chart and decided on the LP553436 battery (which as of 2023 is no longer available), so you'll have to find a comparable one which will physicially fit. It is only 4mm wider, and 4mm shorter than the original, and in taking apart the GameGolf, I believe it would fit fine (and it does!). You should be able to google this battery to find it, but I found it on EBay for about $6:
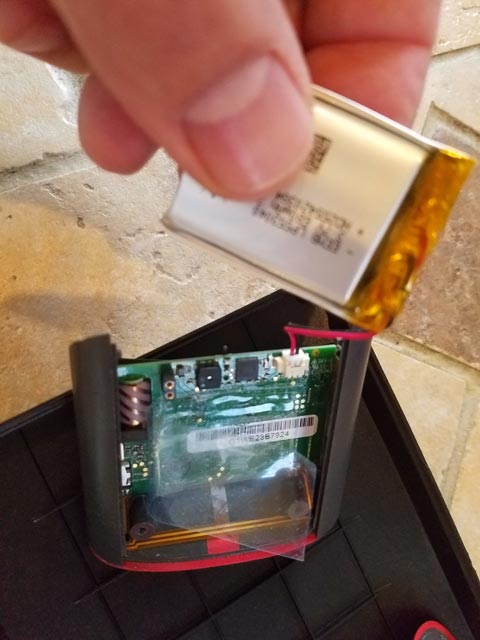
This battery is not a direct replacement. The older style batteries have just 2 connections, while the new ones have 3. In order to use the new battery, you simply need to unsolder the old connector and solder it to the new battery on the correct terminals
Unscrew the 4 tiny screws which hold the back/belt clip on, and place aside. The top two screws are a bit behind the edge of the belt clip but with a small torx or screwdriver you should be able to angle it in to remove it. Why they put these behind the clip I have no idea!

Pull the top piece where the on/off switch is. It should pull out relatively easily. This will make it easier to get to the connector on the board.
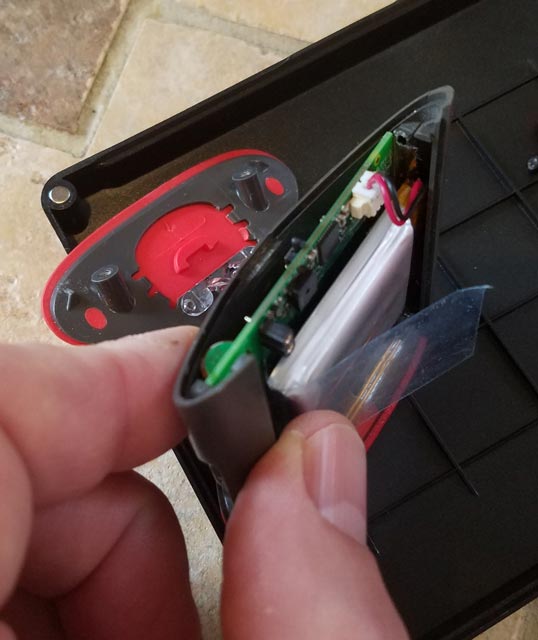
Pull up the plastic cover which sticks the battery in place and carefully pull the battery out, straigtening out the battery wire.
Unplug the battery from the main board, and carefully unwrap the yellow cellophane tape which is covering the terminals. Unfold the terminal board to expose the connections.

The new battery also has cellophane tape protecting the terminals. Remove this tape and set aside. Unfold the terminal board to expose the connections. You'll notice the difference in connectors on the two batteries.
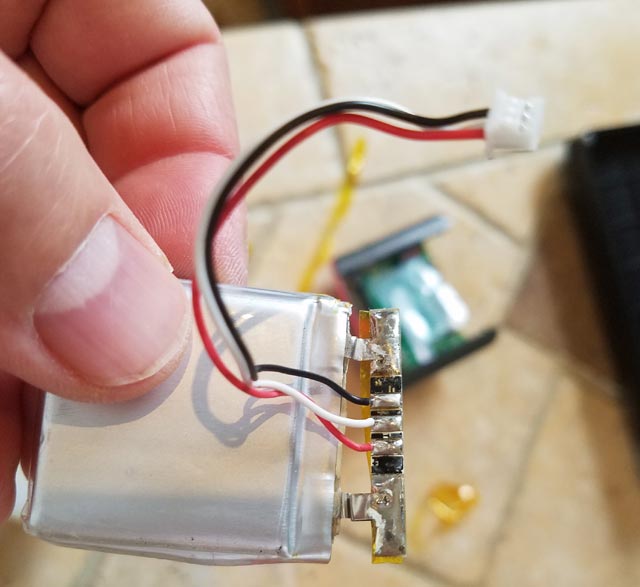
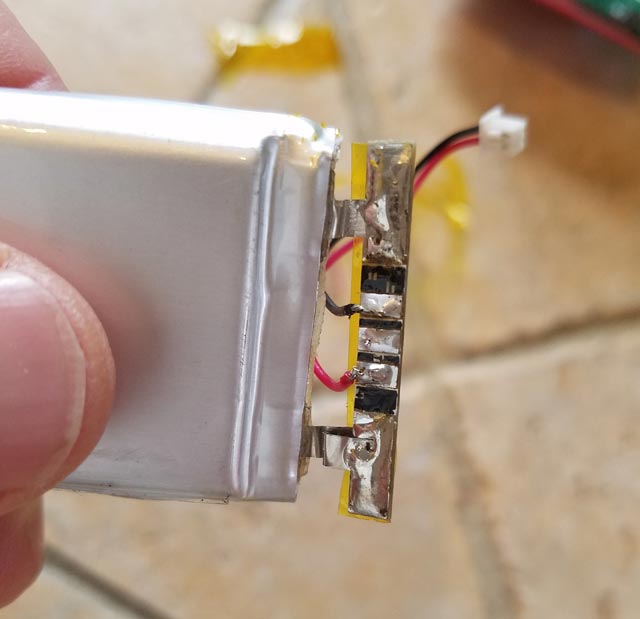
Unsolder each of the connectors from the battery. The GameGolf device only uses 2 connections, so you need to solder the old wire on the new battery. Note the black and red connections on the new battery so you get them in the correct place, and also note the routing of the wires between the battery and terminal board. The 3rd white terminal in the center on the new battery will not be used. After soldering, fold the terminal board back down and cover with the old cellophane tape. If you've ruined the tape, you should get some electical tape to protect the terminals.
Simply plug the new battery in:
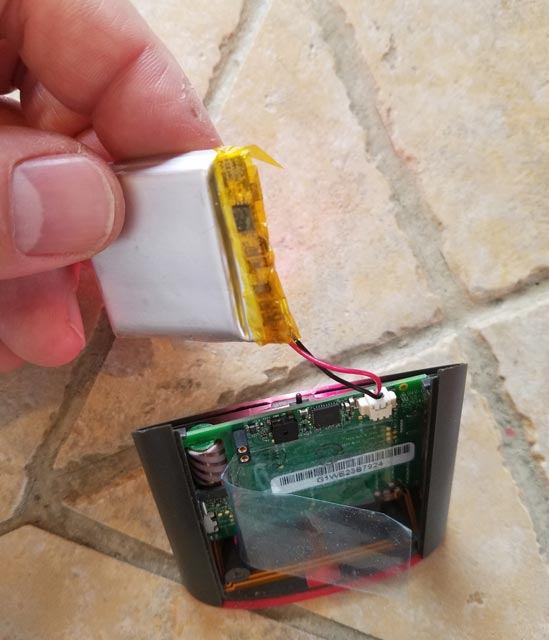
The new battery is 4mm wider than the old one, so it will sit a bit of an angle inside the device. However, it fits fine and doesn't move around at all:
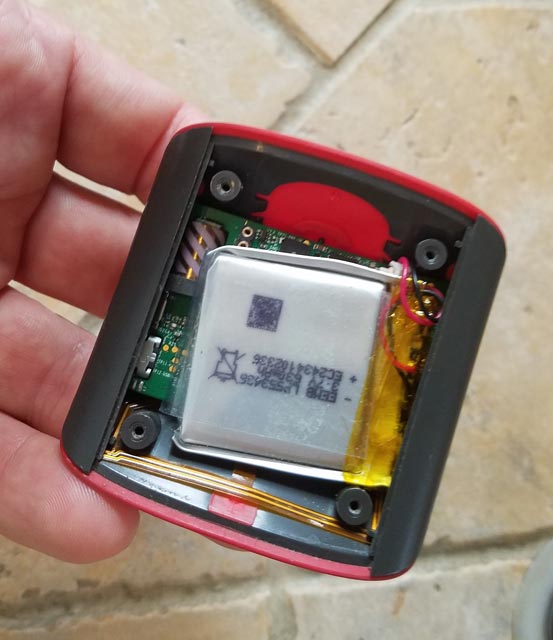
Screw the back onto the unit, and charge it up!