Select a new theme:
Golf League Tracker Default
U.S.A.
Camo
Charcoal
Dark/Nighttime
Desert Sand
Fire and Ice
Monochrome
Ocean
Pink Pastels
SaveCancel
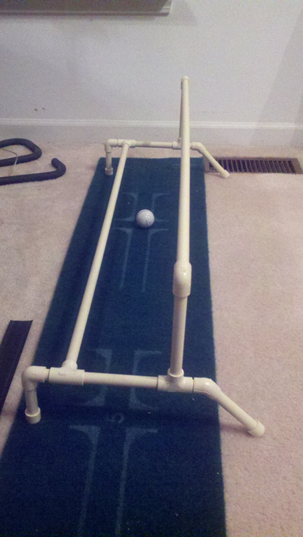
The Putting Plane is a homemade training device which encourages you to stroke the club on plane by making a stroke with the shaft of the putter riding on the horizontal cross bar. It has the same function as another commercial device called the “Perfect Plane Putting Arc” sold by SKLZ, however, this one has the advantage of being “self-adjusting”. The Perfect Plane Putting Arc only works on ONE specific plane, while the Putting Plane adjust to however you set up to the ball, so it’s adjusts to YOUR plane.
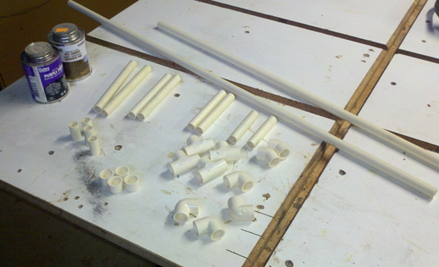
The ½” CPVC is the more flexible variety. It’s ½” OUTER dimension, and is off white in color. It has a bunch of printing on the outside of it, and if you want to clean the part and wipe off the printing before you start, I used lacquer thinner. I would imagine acetone would work as well, but I haven’t tried it.
You need to cut the 10’ long piece of PVC into several segments. I used my chop saw with a stop block set up so I could cut these parts at a consistent length. Be very careful when cutting the smaller pieces and obviously don’t get your hands to close to the blade! You need to cut the 10’ piece into the following lengths:
Alignment is somewhat critical in building this device because a number of parts need to be 90 degrees from one another. I found it easiest to glue up some sub assembly pieces which do not require alignment first. These pieces will help in aligning the other parts.
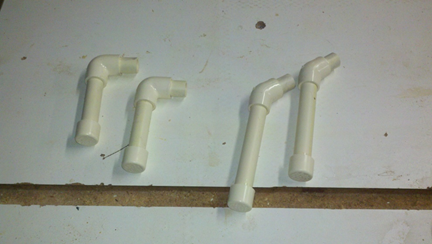
The two front feet consist of:
1-3” piece, 1 90 degree elbow, 1-1” piece, and an end cap. Build two of these.
The rear feet consist of:
1-4.25” piece, 1 45 degree elbow, 1-1” piece, and an end cap. Build two of these.

The cross bar support consist of 1-6” PVC, 1 90 degree elbow. Build two of these. Once dry, attach the two cross bar supports with a 36” cross bar. I recommend gluing one end first, letting dry, then glue the other end. Alignment is critical here, as you want the two cross bar support to be parallel with each other. You only have a few seconds to do this, and I like to lather on the glue and hold it down against a table so it lays flat. (sorry, I don’t have a picture of this).
Now it’s time for a little more assembly. Take the remaining 36” cross bar and glue it into the center section of one of the Tees. Now take one of the front feet sub assemblies and glue it to the end of the tee, making sure the foot is at a 90 degree angle relative to the cross bar. Do this on both ends. The tees should be parallel to each other. Set aside for a couple of minutes to dry.
Once dry, take the 5.5” PVC and glue it to the remaining end of the tee on both sides.
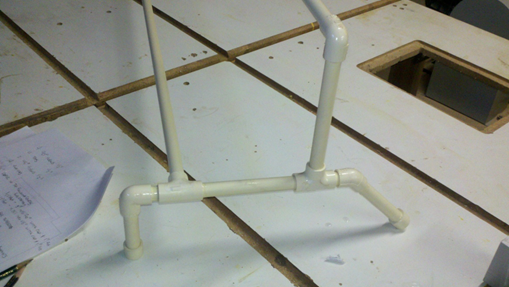
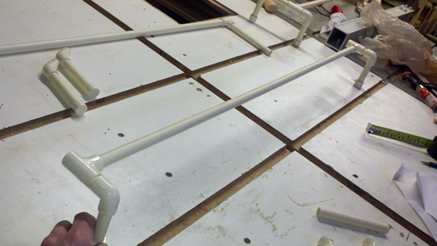
Now it’s time to take the horizontal cross bar, the horizontal reinforcement bar, the back feet, and the remaining 1” pieces and dry fit everything together as in this photo here. I recommend dry fitting so everything gets aligned with everything else. Once you dry fit, start gluing up one connection at a time.
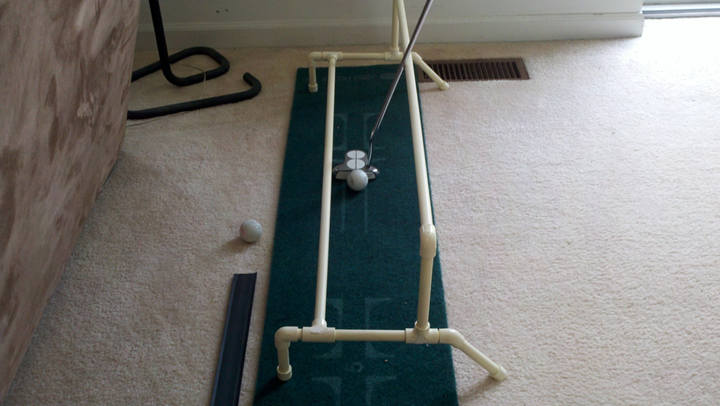
Ok, so you’ve built it, now how do you use it?? Aim your putting plane at your target, and place your putter so the shaft rides on the high horizontal bar, setup and make the stroke. The shaft should ride on the horizontal bar throughout the putt. This will help engrain a slight inside-square-inside stroke, right along the plane of the shaft.